I saw an interesting response to a post in a Facebook group today. A GoPro group to be exact.
The author had posted a video of a trip from a country town into his state’s capital city, with the GoPro acting as a dashcam. In all, there was a smidgeon over 25 minutes of highway footage, with the author inviting people to have a look.
The first responder suggested it was a nice video, in a sarcastic sort of way, and then advised the author to “learn how to edit”. I assume he meant that 25 minutes of footage out of the front window of a car on a highway is not that exciting or interesting.
But it got me thinking. How many hours of footage are shot from phones, cameras, camcorders, GoPros and drones that COULD be interesting, if a little bit of editing was applied? How much footage is lying around languishing as someone doesn’t know where to start?
For some, this could be a very big step. It’s all very well whacking 10 seconds or whatever on TikTok from your smartphone explain why you use black lipstick, but what if you have a story to tell that may be 15, 30, 45 minutes or longer? Where DO you start? And with what tools?
I have been digitally editing footage since 1998 and via analogue before that back to the mid-90s, so figured I might be able to help here with a reasonably quick and easy to follow primer.
So here goes …
For this exercise I’ll be using DaVinci Resolve as the video editor in the screen shots because a) it is free and b) it is available for Mac and PC (and LINUX if you are so inclined). There is also a version for the latest iPads too – but it must have the latest chips in it.
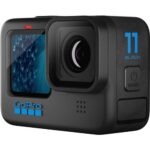
Let’s assume you have 20 minutes of drone or GoPro footage you want to turn into a shorter clip by selecting only all the best bits.
First, here is some terminology:
NLE: Non-linear editor. Just a fancy name for a computer-based video editing program. It’s called non-linear as you don’t need to assemble the video from start to finish. You can create the middle, the end and then the start, or in any other order you like, or even insert or delete sections later.
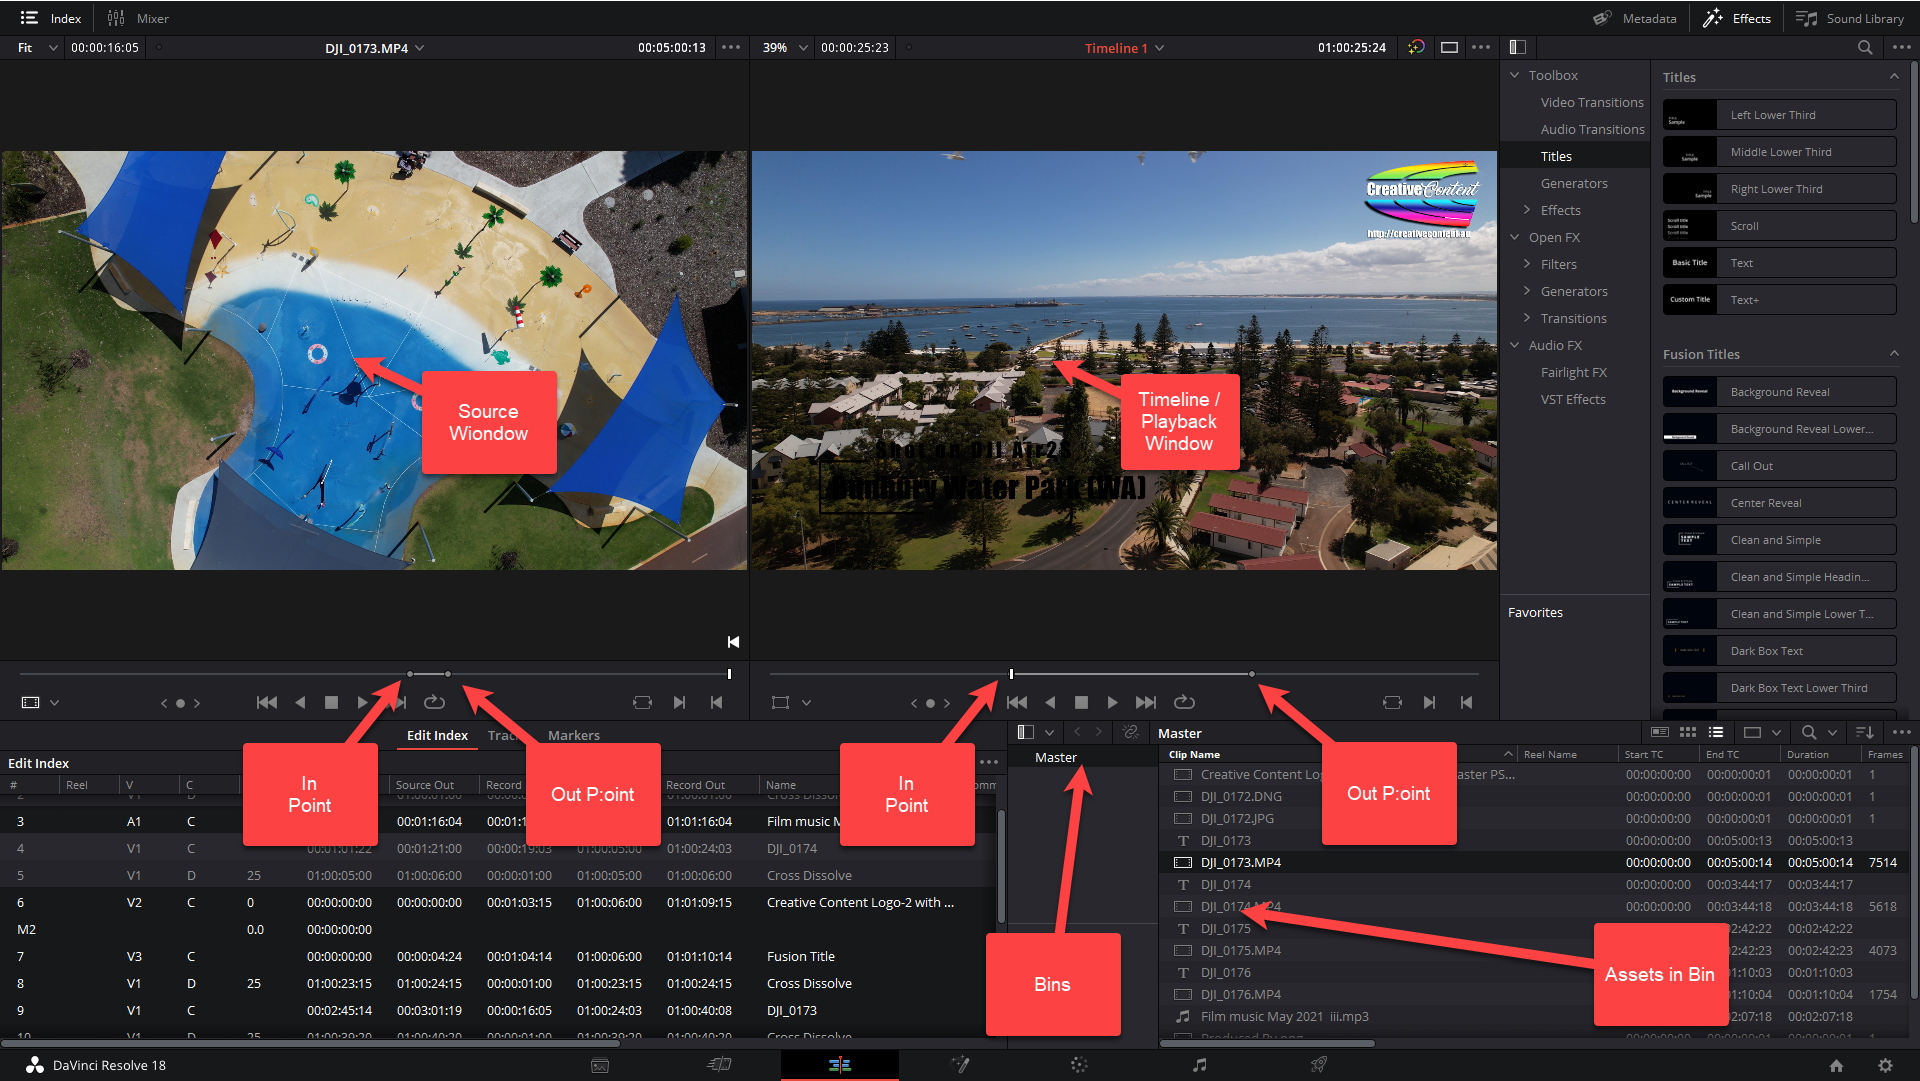
Bin: A location in the NLE where you place all the assets to be used to make up the completed video. Assets can include video clips (eg from your GoPro or drone), audio (from a music track or voice over), still images (eg photos) and graphics (titles or other things created in Adobe Photoshop, Corel Draw or any of a million other graphics applications). You can have many bins, for example, one for each type of asset, or one for locations or dates and times. How you store your assets and name your bins is up to you.
Edit: Simply the method of chopping up video clips (or audio clips) and reassembling selected bits in an order you want. You might also add a “music bed” or a “voice over” dialogue once all the editing is done.
In Point: A location in a video clip to signify where the section you wish to extract will start. For example, if you have a clip that starts at 0:00 and ends at 20:00, you might set an in point at 1:23
Out Point: A location in a video clip to signify where the section you wish to extract will end. In the same clip, you might set the out point at 2:13. These two together give you a clip of 0:50 to add to the timeline.
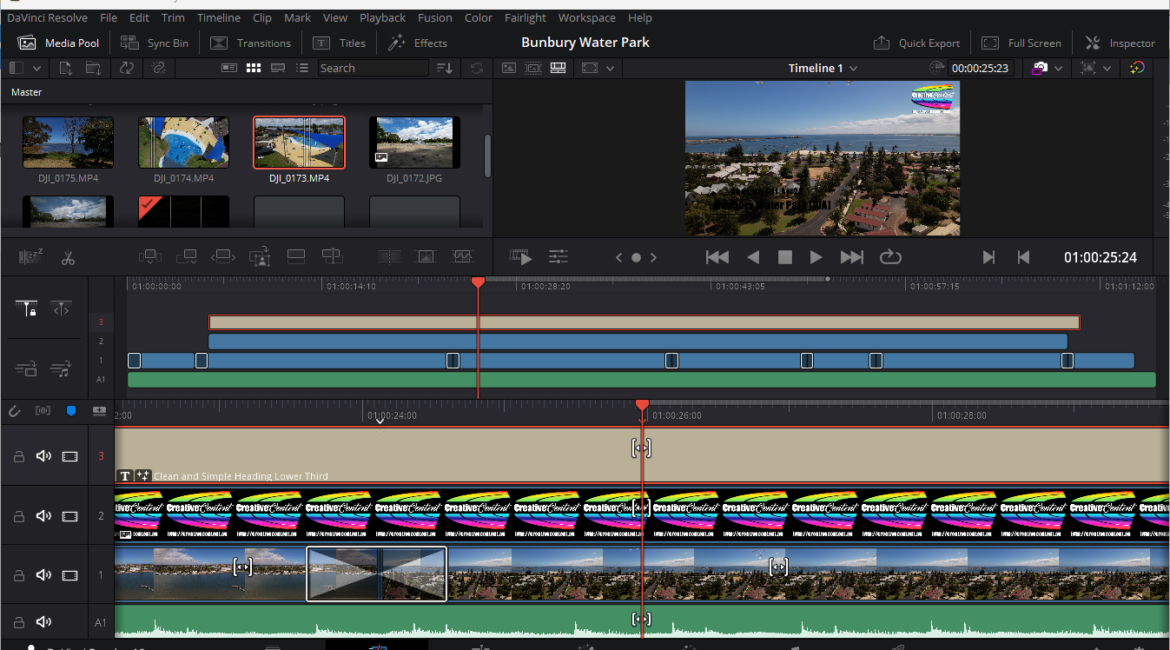
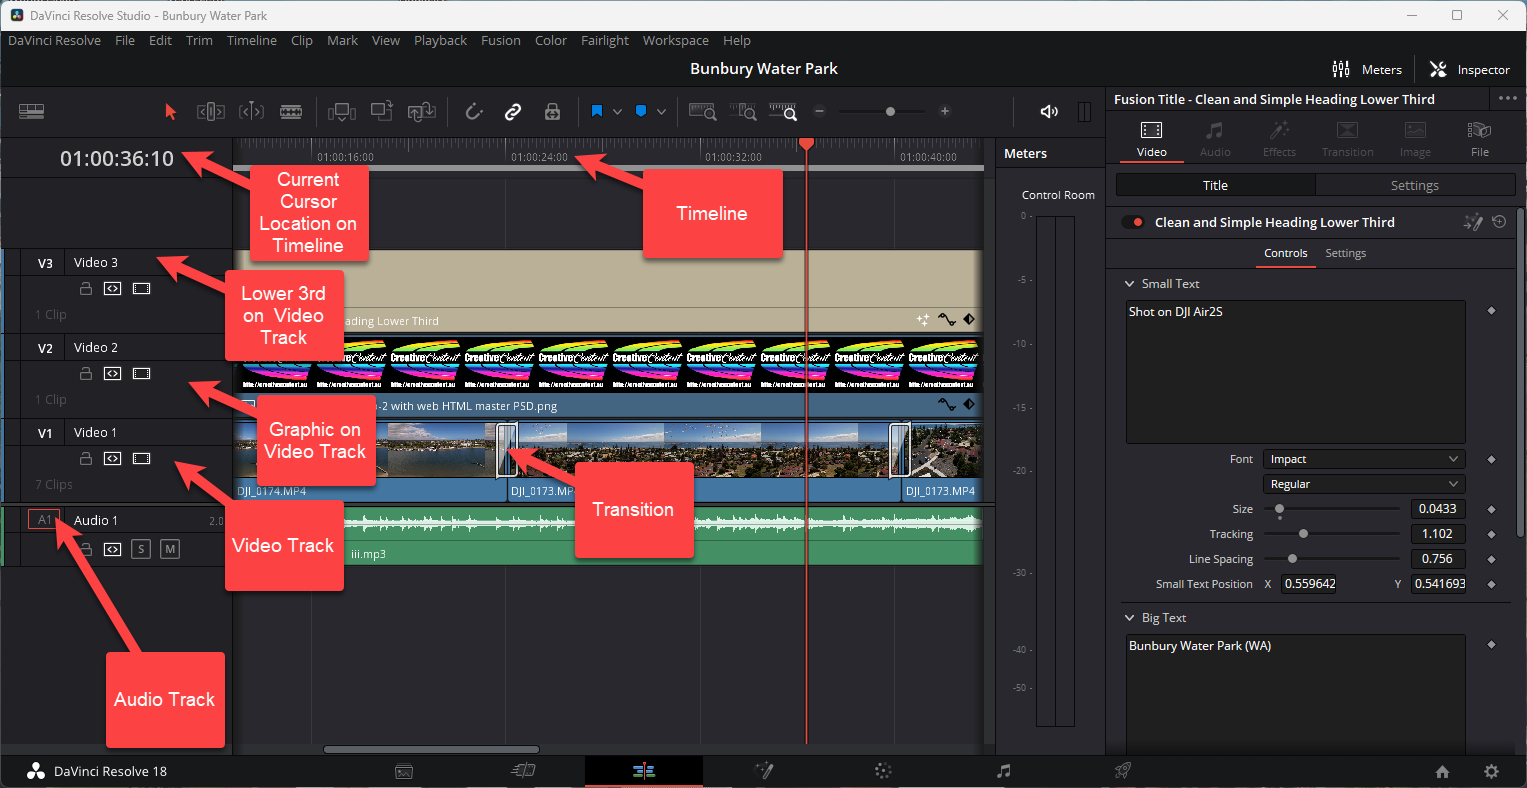
Timeline: The area where extracted clips plus graphics such as titles, still images etc are assembled into their final order. The timeline is made up of a number of tracks.
Tracks: A timeline contains tracks. Some editors have a limited number and others – the good ones like Resolve – have unlimited tracks. There are two types of tracks usually, video and audio. Audio tracks can be linked to video tracks (that is, editing a video track will also edit its associated audio track) or unlinked. Unless you do some special processes once clips are on the timeline, called “compositing” the video on the top track will show in the playback window thus hiding all others that it covers.
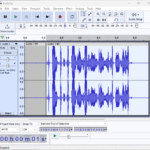
Source Window: This is a window in the editor that shows your footage ready for chopping up.
Preview or Timeline Window: This shows the completed video as it is being assembled. It is a representation of the timeline.
Editor’s Note: (In DaVinci Resolve depending on the mode you are in – Cut Page or Editing – the source window switches to being the timeline window as needed. For a beginner I recommend starting with the Cut Page method. There are also other screen areas such as the Inspector and Track Index but they are outside the scope of this primer)
Transition: An effect as you move from one video clip or audio clip to the next when the video plays back. Common transitions are cut, fade, fade to black (or white) and cross dissolve. Be aware, fancy transitions are NOT to be encouraged as they detract from the story you are telling. For an example, watch any Star Wars movie and 95% of the transitions are straight cuts.
SFX: Special effect. Like transitions, should be used sparingly. Nothing screams “amateur” as much as a gazillion special effects (or indeed transition types).
How to edit
 In very simple terms – and that is really all you need – a video clip is loaded into the source window from a bin, and in and out points set to isolate a section of that clip so that it can be added to the timeline. It’s important to note that digital video editing like this is non-destructive. The original clip stays intact.
You continue to do this until you have selected all the sections of asset videos you want in the final video and have them in the order you want on the timeline. Once this part is done (and after adding to the timeline in and out points can be fine-tuned even further), you can add transitions between the clips.
Be very aware of audio. Beginners in particular tend to think it is secondary to the vision, but nothing could be further from the truth. Hollywood spends a FORTUNE on getting the audio right for its movies. It’s an interesting exercise to watch something like Saving Private Ryan, a Star Wars movie or similar big budget film with your eyes closed and you’ll see just how complex the audio can get.
Conversely, in my favourite film of all time (and classified by many critics as the best film EVER made), 2001: A Space Odyssey, the director Stanley Kubrick makes very skilful use of absolute silence for long stretches.
So make sure your audio, whether it be complimentary as a music bed, or a voice over, or even the raw audio from the footage itself is a part of the overall experience, and above all, necessary.
Finally, you might want to add some titles to explain a location, or a person’s name for example. These are known as lower 3rds. Again, don’t bombard the viewer with these as they are meant to add to the video, not overtake it!
Rendering
Once you have ALL the assets assembled on the timeline in the right order, the story being told flows nicely, audio and video are in balance and there are no glitches such as tiny gaps, video out of synch with a person talking and so on, it is time to “render”. This turns all the stuff on the timeline into a proper video in a single clip.
There are a number of render formats, and inside any particular format, a myriad of parameters you can set. The good editing packages have presets you can use to save you learning all this guff at this stage. Many even have specific presets for YouTube, Facebook, TikTok and so on. Just choose the one that suits where you will be posting that video for public viewing.
If you are still unsure, you cannot go far wrong by selecting MP4 and 1920 x 1080p as the settings (except if you want vertical video which is a whole different ball game I’ll get to in a later tutorial).
And that my friends are the very basics. I’ll try and put together a complete walk-through video if there is demand for it. Let me know via the comments or email me at david@creativecontent.au.
At my website (creativecontent.au) I have a bunch of tutorials covering all things video and audio, but there are a pile of drone and specific ones if you are interested, and I also do a free regular e-magazine and podcast.
Feel free to visit; I don’t actually sell anything by the way.
You can get your free copy of DaVinci Resolve at Blackmagic Design’s website by clicking here.
And don’t forget you can download my latest 10 minute podcast by clicking here.
Other stories You Might Like...
 Tutorial: Basics For Editing GoPro / Drone Videos – Part 1
 Tutorial: Basics For Editing GoPro / Drone Videos – Part 2
 Tutorial: A Quick Primer on Filters
 Which Drone? A Drone Primer and Buying Guide
 Microphone pickup types. A quick primer.
 Why Won’t My Video Playback from My GoPro (or other hi-res capable camera)?
 The Ease of Video Creation

while i can read it enough to at least try it, an actual video of the process would be highly advantageous!! as i learn better when shown rather than told to read it 😉
Yep. I hear ya! And I am working on it. Just have to get my next podcast done and dusted and that is my next project.