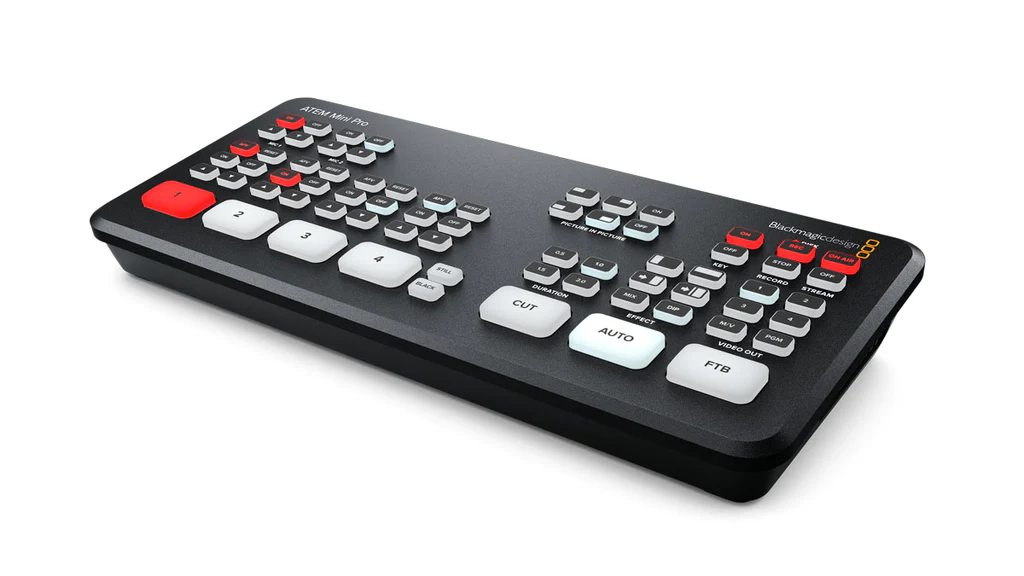
The tutorials for the Blackmagic Design ATEM Mini Pro I have placed on the website over the last 2 years are by far and away the most popular stories of the ones that are there (in the thousands these days).
But it suddenly struck me that although I have done tutorials for creating lower 3rds, using the up and downstream keyers and previewing and switching, I have not done one on the physical setup of the unit.
In truth it is not that hard; there are a couple of things you can do though that make the Blackmagic Design ATEM Mini Pro an even better tool.
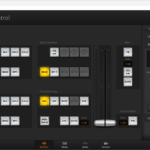
Before you start, the first thing I recommend is to download the free Blackmagic ATEM Software Control program. You can get that here.
Once everything is setup, I’ll then explain why this is such a good add on.
There is another thing that is very useful I have found, but you need a 3D printer for this. It is a set of brackets that lift the Blackmagic Design ATEM Mini Pro off the desk and angle it forwards slightly. This has two benefits; firstly it makes the physical operation a bit easier, with the labels on the various buttons easier to read as you become familiar with the Mini Pro, and secondly, it helps with the cooling of the unit.
You can get the ZIP file containing the printable 3D files here.
Setting Up
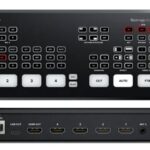
The first thing you need to do is apply power to the Mini Pro. Blackmagic supplies a special power supply for this with a screw in connector, so do not lose it as you can’t go to a simple electronics store to get a replacement – you have to get it from Blackmagic.
Note: It is good practice to have the power OFF when attaching all the relevant cables such as HDMI, Ethernet etc.
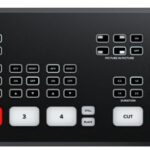
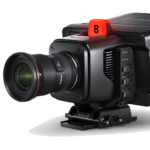
Next, you want to add in you HDMI cables connecting your cameras. I run a series of GoPros in inputs 2 and 3, leaving input 4 for my Blackmagic Pocket Cinema Camera 6K Pro. Input 1 is for the image coming from my computer.

Why would I do this?
This allows me to capture the steps taken when creating tutorials for software showing mouse clicks, keyboard strokes and so on.
To explain this further I need to digress a fraction and explain my PC setup.
I run a pretty bog-standard Dell tower with one monitor on HDMI and the other on DVI. To get the feed from the computer to the Blackmagic Design ATEM Mini Pro, I have an HDMI splitter connected to the cable and one of these runs to my second monitor and the other to HDMI 1 in on the ATEM.
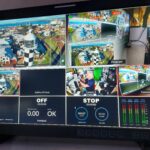
I then run an HDMI cable from the HDMI out of the Blackmagic Design ATEM Mini Pro to the 3rd monitor, an OSEE LCM215E that I love.
The next thing to do is run an ethernet cable if you want to do direct live streaming using Facebook, YouTube etc using the Blackmagic Design ATEM Mini Pro with the Blackmagic ATEM Software Control program (see below)
For audio, the Blackmagic Design ATEM Mini Pro has a pair of standard 3.5mm inputs. How you use these depends on your needs; some people have two mics connected in order to do guest interviews. Others have the first for vocals and the second for musical input via a media player which is the way I have it connected up.
I have tested many, many mics before I found the one best suited to my environment, a Sennheiser MKE600. As this mic uses an XLR (also know as a cannon) connector, you need to get hold of an adaptor to switch it to 3.5mm, but a good electronics store will have these available for a reasonable price.
The final thing you can connect is an external hard drive to record sessions for later playback. This connects to the built in USB-C port.
Again I have tested many devices in this area and have standardised on a particular unit for a specific reason.
As the Blackmagic Pocket Cinema Camera 6K Pro can also record direct to an external hard drive, I have gone with one of the recommended drives from Blackmagic which is a Samsung T5 This is available in either a 250GB or 2TB configuration. This means I can double up their usage between the Blackmagic Design ATEM Mini Pro and the Blackmagic Pocket Cinema Camera 6K Pro.
If you choose not to add an external hard drive, the USB-C port can instead be connected to your computer which will then ‘see’ the whole setup as a pseudo web cam letting you also live stream, just not with the anywhere near the same measure of control and flexibility that the Blackmagic ATEM Software Control program connectivity will give.
Blackmagic ATEM Software Control program.

Once you have the basic unit setup, then you can easily configure your streaming of software of choice – Facebook, YouTube etc – to take the input directly from the Blackmagic Design ATEM Mini Pro.
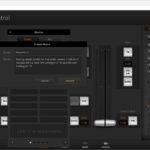
But adding the Blackmagic ATEM Software Control program into the mix expands this capability greatly.
To quote from the manual, “For example, you can manually perform transitions using the fader bar, select internal sources on the program and preview buttons, mix audio using a mixer with channel faders, set up keyers, load graphics in the media pool and much, much more.”
This takes all of the heavy lifting off the PC and any software. But as they say, wait, there is more!
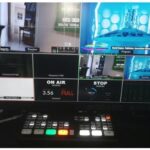
You can set up the ATEM switcher settings in one of two ways, cut bus (the default) or program preview, and these settings are changed in the Blackmagic ATEM Software Control program and fully detailed in the manual (which you can get here if you want a bit of light reading!).
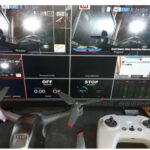
In cut bus mode, as soon as you press the input button it immediately switches to being on air. Alternatively, in program preview mode, it becomes a two-step process to switch sources.
Pressing an input button puts that source into a special preview mode. This means you have the chance to change your mind and select another source if you want and this is the common way of switching in the professional broadcast world.
I use the second method, hence my adding the third monitor which gets the preview signal via the HDMI out on the Blackmagic Design ATEM Mini Pro.
Conclusion
As I have stated a couple of times in previous stories, back in the 90s when I was writing and directing the suite of videos that became the definitive tutorials for Windows 95 and Office 95 (there were about 20 x 90 minute videos covering the lot), the equipment we needed to create these, capture on-screen graphics, switch in graphics, add text and so – let alone the camera to shoot this stuff – was worth tens of thousands of dollars.
Today, with something as simple as a smartphone, you can just about mimic what we did, with a Blackmagic Design ATEM Mini Pro that costs around $500. And do it live to an audience of hundreds, thousands or millions.
Its mind boggling and exciting at the same time.
Have fun!
Other stories You Might Like...
 Tutorial: Live Broadcast Blackmagic Design ATEM Mini Pro Workflow Example
 Tutorial: 2 ways to add a PIP (Picture-in-Picture) effect with the Blackmagic ATEM Mini Pro
 Tutorial: Adding a remote guest to a Blackmagic Design ATEM Mini Pro live stream
 Tutorial: Streaming Setup Blackmagic Design ATEM Mini Pro Part 1
 Tutorial: Setting Preview and switching in Blackmagic ATEM Mini Pro
 Quick Tutorial: Blackmagic Design ATEM Mini Pro and Facebook Live using XSplit Broadcaster
 Quick Tutorial: Upstream/ Downstream Keying with BMD ATEM Mini Pro
 Tutorial: Creating Lower 3rds for use in BMD ATEM Mini Pro Live Streaming
 Blackmagic Design: New ATEM Mic Converter, Studio Camera 6K Pro, ATEM TV Studio HD8
 Blackmagic Design ATEM Mini Pro and Macros. Here’s How.