So. You are the proud owner of a shiny new GoPro or DJI drone. And as you do, you have been out and about shooting footage and coming to grips with the thing.
On the SD card is now a few hours of video, but a lot of that is rubbish you don’t want such as shots of your shoes, inside your pocket, nothing but sky, inside your backpack, the floor of the car, the tree you hit, and so it goes on.
We’ve all done it.
You might even have played with more advanced functions such as Hyperlapse, Mastershots and Time Warp.
But first things first eh?
I keep a close eye on many of the Facebook groups and the like, dedicated to GoPros, drone flying and action-type cams in general, and see many, many people confused, or at a loss as to how to edit this footage they have obtained in order to turn it into something watchable.
So all of us here at Australian Videocamera pout my head together and decided to put together a series of primers to assist.
Questions?
If you have a specific question, feel free to ask either on our Facebook page (Australian Videocamera), in the comments below (its anonymous) or via email (david@auscamonline.com). Whilst I won’t be able to diagnose hardware problems for cameras or drones, if you want advice as to what programs to use etc, feel free!
So let’s dive in and in this first lesson, go through the basics of what you need to understand and do without getting too specific.
Video Editing
There are many, many inexpensive editing packages out there with which you can create beautiful video stories. Examples for Windows include Adobe Premiere Elements, Filmora, Corel VideoStudio, Pinnacle Studio, Cyberlink Power Director and more. On the Mac there are not as many choices, but you have iMovie, Final Cut Pro and Power Director 365 for starters.

The package I am going to use to demonstrate concepts and the like is Blackmagic Design DaVinci Resolve. This has the advantage of having versions for both Windows and Mac (and LINUX) but is also free. You can get it here.
Further, whilst for the basics it is relatively easy to learn and use once you understand basic concepts, it is in no way a ‘lite’ package! Before Blackmagic Design (an Australian company by the way) bought it, it was Hollywood’s favourite program, specifically as it does the very best colour grading you can get, and cost – wait for it – up to $300,000!
Workflow
You will hear a lot of people in the editing business talk about “workflow” when it comes to video editing. Don’t get put off or intimidated. It’s not part of a secret set of terms only experienced video editors understand and have to roll up a trouser leg and wear one sock to be allowed to learn.
It is just shorthand for “I plan and do my editing using these specific steps”.
There is no right way or wrong way, you do what you feel comfortable with. Someone’s way of performing their editing may be one man’s ceiling but another man’s floor. Or person. Whatever.
But it is good before you start to have a clear idea of what your intended end result is and have a plan to get there.
The basic steps for this are:
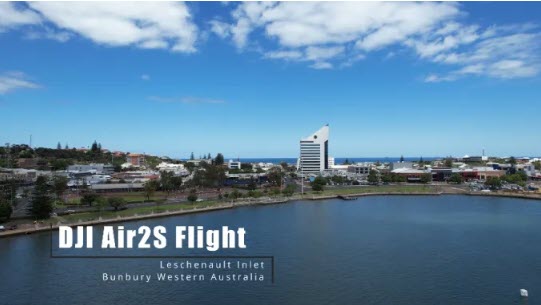
 Collate all the assets (video clips audio files such as voice over, music, ambient sounds etc and still shots and graphics) you are going to use into a single folder. I use a folder system like you see here. The project is called “Drone shots over inlet” and inside that I have sub folders for drone video, non drone video, music, voice (narration), ambient, stills, graphics and other.
- Write out a very rough script of what story you want to tell with your video. It doesn’t have to be War and Peace or even typed. A series of stick drawings (called a storyboard) will do. It simply gives you a plan to follow.
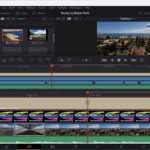
- In your video editing package, create the tracks you are going to be using. The total of ALL the tracks is called the timeline, and is measured by, obviously time starting at 0:00 (the beginning) and going to the end of the finished video.
 Important: if you can, name each track according to its content and / or colour code it for easy reference. Using my “Drone shots over inlet” example, I’d have separate video tracks for drone shots and shots from other cameras, a track for stills, separate audio tracks for voice overs and music and I tend to add another track from graphics such as water marks, titles etc.
 - Now you can import all your assets into the program. If your video is short and you don’t have that many, then with DaVinci Resolve you can simply import them into a single “bin”. But as your needs grow and you have more and more clips, stills, graphic images, audio files and so, down the track you’ll want to investigate the bigger use of the bin system to keep even closer track of your assets.
- I start adding video clip assets to each of the tracks in the order you have in your script / storyboard. Again using my “Drone shots over inlet” example, I’d lay down all the drone shots in rough order and then using the editing tools such as the trimmer, cut out the pieces I don’t need. I’d then do the same for any other video clips. Of course, you can move them around on the timeline as you like to change the order. In fact, I guarantee you will. But as you get more experience / confidence in the process, especially with your script / storyboard, you get better and better at initially laying out the clips.
Note: that any audio captured with the video is “grouped” to that video clip and sticks with it unless you “ungroup” it. When you import a video clip to the timeline and place it onto a video track, most video editing packages will automatically create a matching audio track for you. This can be edited separately later if needed, or even removed altogether.
- Next you can add the stills to their track in the timeline in the approximate location they are to appear in the finished video. You can change the duration of a still easily, but it is best to keep length short as people lose interest after gazing intently at a still image for a while.
- Now you can add the voice over to match the story. Again if you have it as one long clip, you can edit it by cutting and moving pieces around to match any video it refers to eg “from this shot from the drone, you can clearly see the yacht club below”
- I tend to leave the music until the very last. But that is just me and it DOES depend on the storyline and the music you have chosen. In fact, adding music and other sounds to a video is a whole separate lesson as you want the clip to match the music. Stay tuned and I’ll deal with this a bit later. For music, I use a program called Sonicfire Pro 6.
- Finally, you can add your titles and any graphic overlays such as watermarks. For these, you can use the inbuilt tools of DaVinci Resolve or use a 3rd party application such as Adobe Photoshop Elements to create them and import these into DaVinci Resolve.
 Once all the editing is completed, you then export the finished video using whatever format your viewing audience needs. This might be an export to YouTube, to a USB stick or SD card, to Instagram, a Blu-ray disc and so. When rendering – the final part of the editing process – you nominate to DaVinci Resolve what that destination is to be and it will create the completed file accordingly.
In the next tutorial, I’ll run through the basic editing tools in DaVinci Resolve you’ll need to be able to make a finished timeline ready for rendering and exporting.
In the meantime, here are links to some other resources you may find useful:
Useful Downloads
- Blackmagic DaVInci Resolve (free)
- Manual for Blackmagic Design DaVinci Resolve (free)
- GIMP (a free image editor like Adobe Photoshop)
- Final Draft (a scriptwriting program)
- SonicFire Pro 6 (for music creation)
- Audacity (free audio editing)
- Snagit (to create screen grabs stills and videos)
- Kyno (image / still / audio asset manager and simply brilliant)
Other stories You Might Like...
 Tutorial: Basics For Editing GoPro / Drone Videos – Part 2
 Basics of Video Editing: A Primer
 Which Drone? A Drone Primer and Buying Guide
 Drone Tutorial: Mastershots and Active Track
 Tutorial: Drone Video – Tips to Get The Best Footage
 Tutorial: Creating GoPro Shooting Presets
 Tutorial: A Quick Primer on Filters
 GoPro Hero 11 footage V GoPro Hero 12 footage
 Mini Tutorial: ND Filters