Introduction
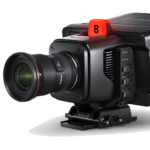
Before we start, for those new to this, let’s look at what the Blackmagic Design ATEM Mini Pro is.
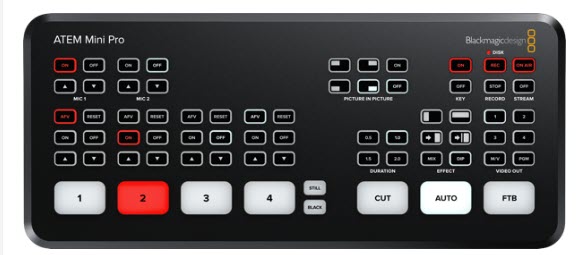
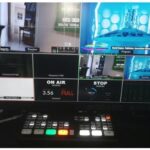
In simple terms, the Blackmagic Design ATEM Mini Pro is a broadcast switching panel letting you input video streams from up to 4 HDMI sources (cameras, computer output etc) and switch between them with the push of a button.

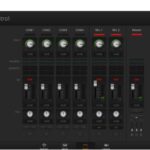
Additionally, you have two audio inputs so you can say, have one for a microphone for dialogue and the second for music. Alternatively, you may wish to use 2 mics – one for you, the host, and one for a guest, either locally or remotely.
Finally, there is a single HDMI out port letting you plug in an external monitor to view exactly what your camera(s) are “seeing”.
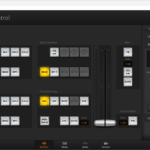
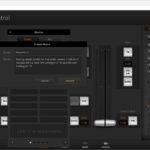
In its basic configuration, your PC will see the Blackmagic Design ATEM Mini Pro as a simple webcam that you can use for Skype, Zoom, Microsoft Teams etc, or, by adding the free ATEM Software Control, you can turn the Blackmagic Design ATEM Mini Pro into a complete very powerful broadcast panel with overlay graphics, titles, effects and automation using macros, as well as having a sophisticated audio mixing system.
Part 1 – Setting up the Blackmagic Design ATEM Mini Pro as a webcam
Setting up the Blackmagic Design ATEM Mini Pro to act as a sophisticated web cam system is simplicity itself.
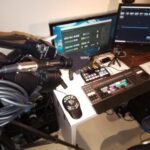
First off, connect all your cameras to the HDMI ports (1-4) and any mic(s) or other audio devices you want to use to the mic 1 and mic 2 port(s). If you have an external monitor, attach this to the HDMI out port. Make sure on the Blackmagic Design ATEM Mini Pro the M/V (Multiview) button is on.
When all the cameras are running, pressing the respective button on the Blackmagic Design ATEM Mini Pro (1-4) will switch seamlessly between cameras.
Next, you want to connect your computer to the Blackmagic Design ATEM Mini Pro by using the USB port. Once connected, your PC will automatically see the Blackmagic Design ATEM Mini Pro as a webcam.
To test this, we’ll use Skype.
Fire up the Skype application, click on the three dots as shown, and choose Settings.

Scroll down to the Audio & Video section and on the top right, click the drop-down menu and select Blackmagic Design.


The image from whichever camera is selected on the Blackmagic Design ATEM Mini Pro panel should now display in the viewing window of Skype. If you wish, you can also select a custom background at this time.
You’ll now want to select the microphone to use by scrolling down a little further. You can either choose the default PC mic, or whichever device you have plugged into the Blackmagic Design ATEM Mini Pro mic port(s).
Transitions and Cuts
You can switch between cameras with a straight cut – a “jump from one camera’s image to the next. But the Blackmagic Design ATEM Mini Pro has some built in transitions you can also use such as push down, push right and so in. You can also choose whether to dip, mix squeeze and other effects during the transition. All of these buttons are above the AUTO button which is used to actually perform the transition.

Picture in Picture
Many people like to stream video with the main image being their gaming experience and smaller video superimposed being their own image. This is called Picture-in-Picture – or PIP – and is very easy to do with the Blackmagic Design ATEM Mini Pro.

Let’s say that HDMI port 2 has a feed from your computer of your game play. To enable your camera feed – your image – to superimpose over this, make sure it is connected to HDMI 1 – this is the port the Blackmagic Design ATEM Mini Pro uses via its built in digital effects processor (DVE) to create a PIP.
Conclusion
So there you have the Blackmagic Design ATEM Mini Pro acting as a sophisticated webcam using Skype. The setup for other apps pretty much follows the same steps, but half the fun is seeing what happens after setup and trying out the various buttons on the Blackmagic Design ATEM Mini Pro.
In the next tutorial, I’ll introduce the ATEM Control Software that gives you infinitely more control.
Other stories You Might Like...
 Tutorial: Live Broadcast Blackmagic Design ATEM Mini Pro Workflow Example
 Tutorial: Adding a remote guest to a Blackmagic Design ATEM Mini Pro live stream
 Quick Tutorial: Blackmagic Design ATEM Mini Pro and Facebook Live using XSplit Broadcaster
 Tutorial: Creating Lower 3rds for use in BMD ATEM Mini Pro Live Streaming
Mini Tutorial: Blackmagic ATEM Mini Pro -Getting Started
Tutorial: Creating Lower 3rds for use in BMD ATEM Mini Pro Live Streaming
Mini Tutorial: Blackmagic ATEM Mini Pro -Getting Started
 Blackmagic Design: New ATEM Mic Converter, Studio Camera 6K Pro, ATEM TV Studio HD8
 Blackmagic Design ATEM Mini Pro. NOT just for Vloggers…
 Blackmagic Design ATEM Mini Pro as an audio mixer? Sure can!
 Blackmagic Design ATEM Mini Pro and Macros. Here’s How.
 Tutorial: Setting Preview and switching in Blackmagic ATEM Mini Pro