Over the years I have banged on endlessly about understanding aperture, shutter speed, ISO and so on. I’ve even written a few tutorials on the subjects.
There is another couple of areas though that are equally as important and often overlooked, especially if you are a beginner, or have graduated to a higher-level camera from a point and shoot or even a smartphone.
Exposure and focus.
Focus is pretty straightforward; is the image sharp? End of (although there is the added side issue of depth of field which I have written about here on the old web site). Check your camera manual though as you also have some focussing assistance tools like focus peaking or focus magnify.
Exposure is a bit more complex, so first I need to explain exactly what it is.
In simple terms, exposure is the amount of light that reaches your camera’s sensor over a period of time, and this is what creates the image. This time can be be fractions of a second, for example when shooting sport to freeze an image, or entire hours when getting astronomical images. The right exposure for the image and conditions at hand is the key. Overexposure leads to overexposed highlights. Underexposure means an image is dark and hard to ascertain detail.
While many things can be “fixed in post”, bad exposure generally is not one of them. The reason for this is quite simple. If you understand that “brightness” is measured on a scale of 0 to 99 (with 0 being totally black and 100 being totally white). Between the two are varying levels of shades of grey. This scale is called the IRE scale by the way.
If an image is either under or over exposed, then there is no data in some of these grey areas at the top or bottom of the scale and you cannot get back or put in what does not exist in the first place.
So, to assist in eliminating this, your camera may have some tools built in such as Zebra Patterns, Waveform Monitors, False Colour and Histograms.
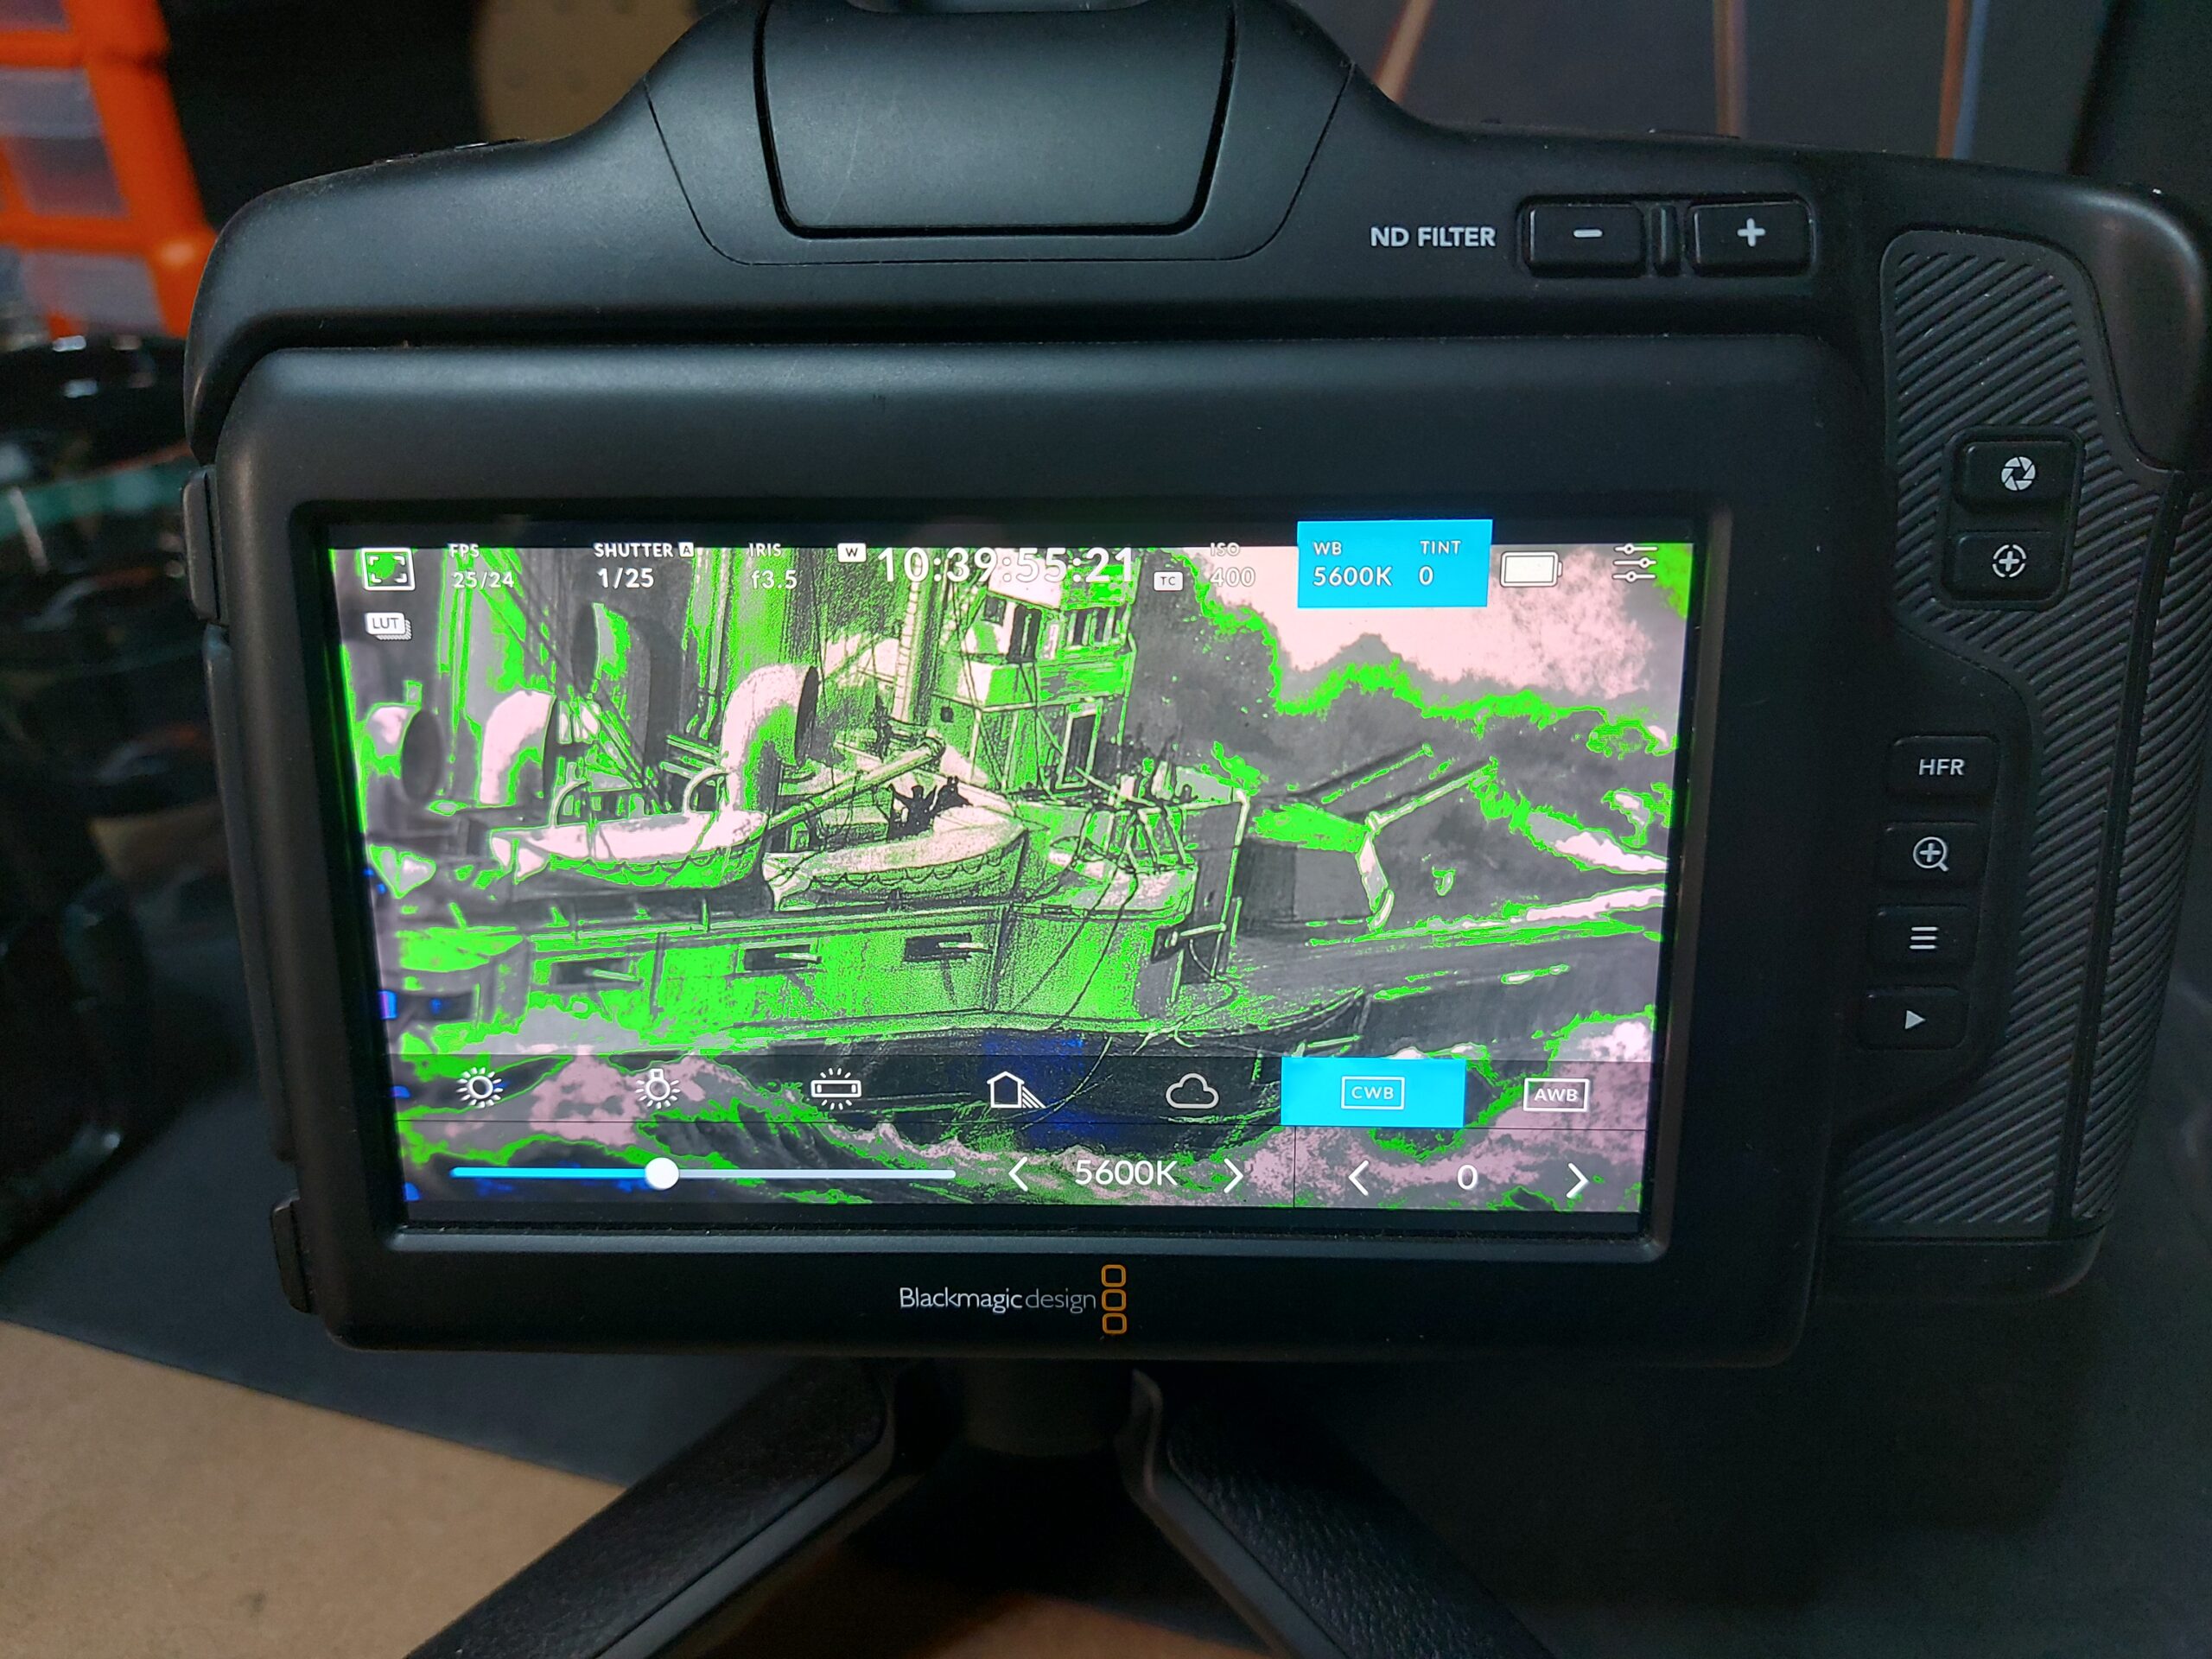
 Zebra Patterning
When this is turned on, the camera overlays black and white stripes on your image on the monitor so you can see what parts of the image might be overexposed. When you get a situation like this, you can quickly adjust the exposure level on the camera. Some cameras may let you change the values at which zebras will display.
Waveform Monitors
When you have this activated on your camera, from left to right you get a representation of the image based on the IRE value. The top of the screen is 100 and the bottom 0, so it stands to reason the middle of the screen is the mid-tones. If your highlights are getting up to the 100 mark you risk overexposure and when they reach it, then the image becomes clipped. The same applies to the bottom. Again if this is showing, you can manually tweak the exposure settings on the camera to get them down (or up).
If you ever intend to perform colour grading, knowing how wave monitors work is a must.
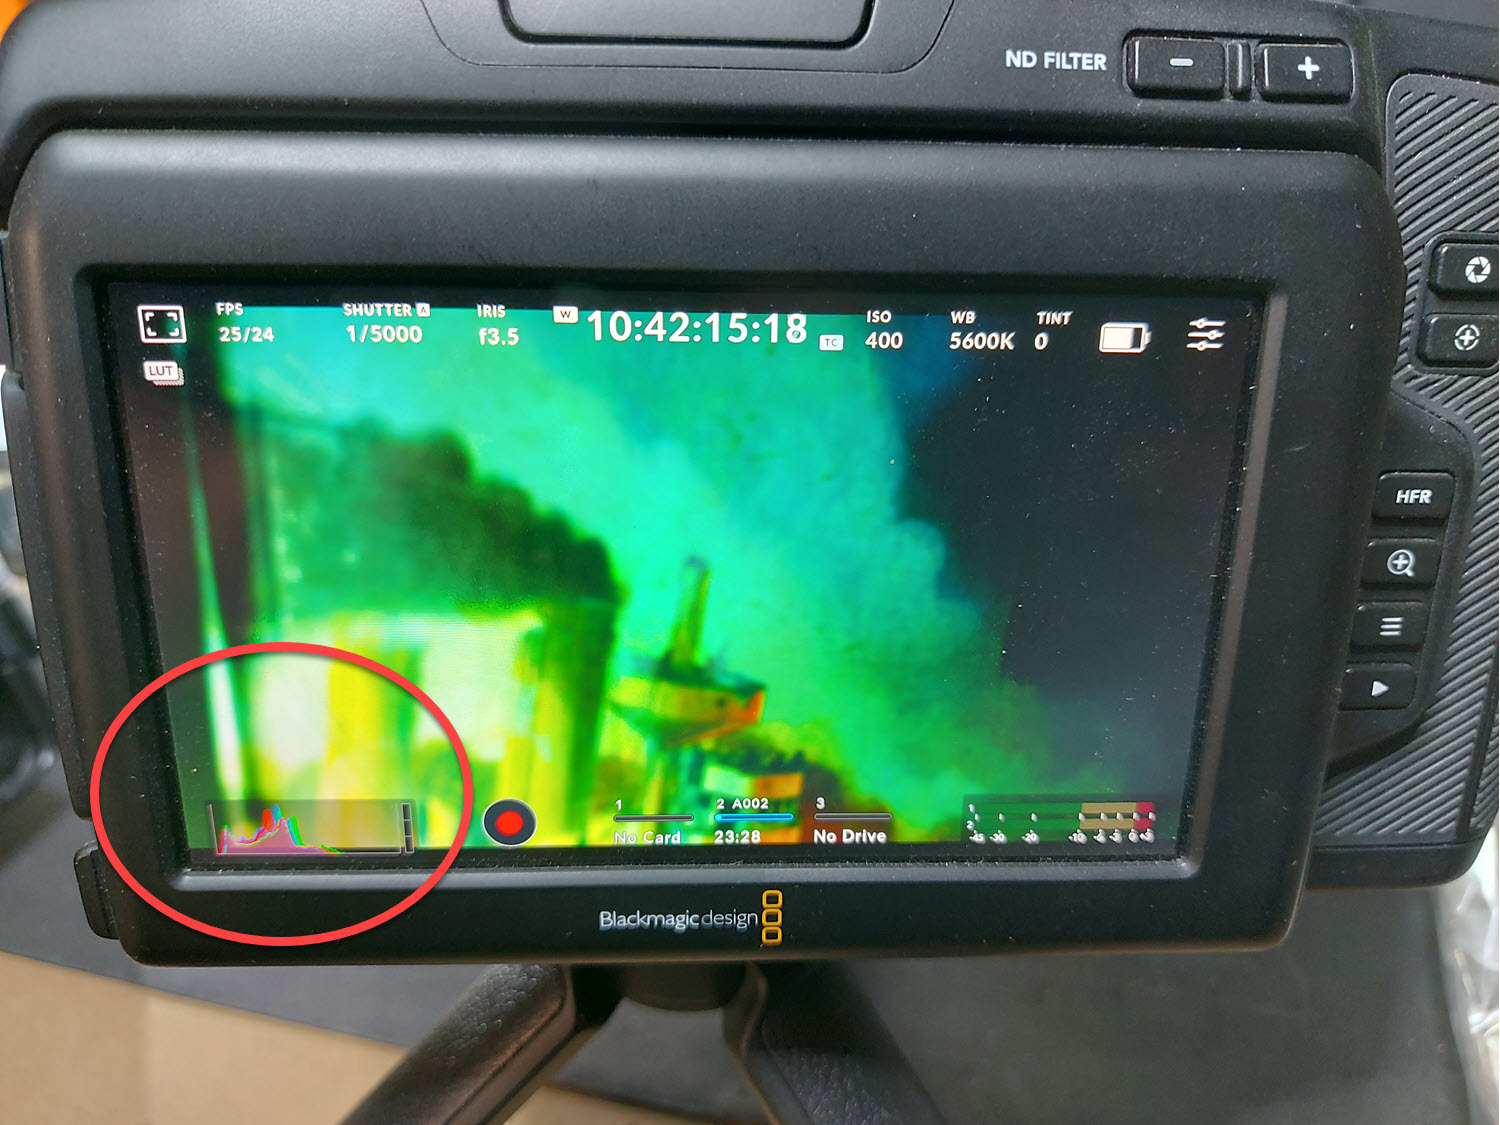
Histograms
This is similar to the wave form except is goes from left to right as against bottom to top and might remind you of the X, Y charts we used use at school. If the left side is much higher than the right for example, you have more dark areas in your shot. If the right is higher, then you are overexposed and you need to adjust accordingly.
The ideal is a level histogram that stays away from the edges.
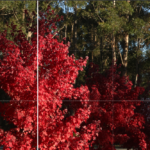
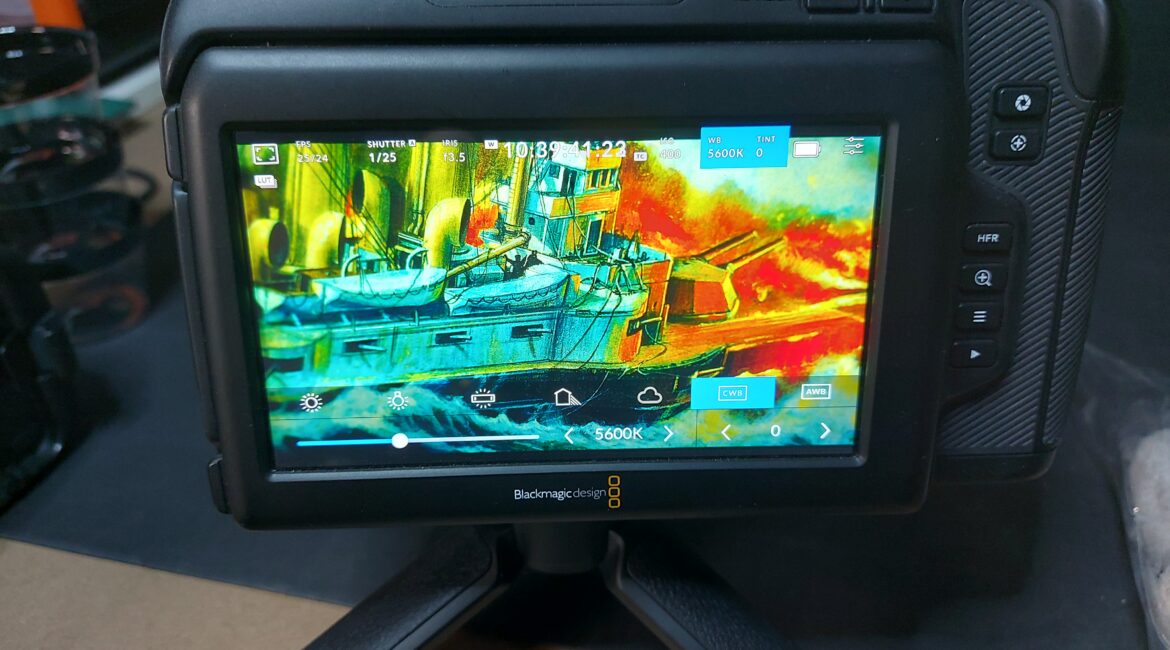
 False Colour
As distinct from zebra patterns that only show up in areas that apply (overexposed), false colour assigns a colour to show different IRE values across the whole shot. On my Blackmagic Design Pocket Cinema Camera Pro 6K, areas at the tops end appear red, low areas are purple and mid tones green. This gives you a very quick representation of exposure and is also very useful for assigning contrast with your lighting.
Check your camera’s manual though as they may have assigned different colours for the values.
Conclusion
So there you have a quick primer on exposure. As in many things, the best way to get used to it is simply practice with each tool under varying circumstances such as bright sunlight, overcast days, under different types of indoor lighting and so on. Once you get the hang of using these tools, you’ll shoot much better images – both video and still.
-
Don’t forget to subscribe to my site (its free) in order to go into the draw to win a Zhiyun Molus G60 Lighting Kit Combo
-
And don’t forget our latest podcasts! Listen here.