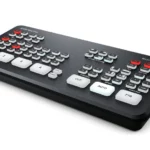
One of the brilliant things about the Blackmagic Design ATEM Mini Pro (and its derivate versions such as the ISO) is the Media Pool. This is an area in memory of the Blackmagic Design ATEM Mini Pro where up to 20 graphics can be stored for recall on the fly into your live production.
The most efficient way of doing this is via a macro, but this is not the scope of this particular tutorial.
For people new to this stuff, there are some spooky magic tricks they haven’t quite grasped, and one of the major ones is creating lower thirds with transparency to overlay their live broadcast.
So here I have put together a quick and dirty step-by-step creating a simple lower third in Adobe Photoshop. If you follow this to the letter, you shouldn’t go wrong! If you do have any issues, feel free to email me!
Step 1: Create a blank document with the custom dimensions of 1920 x 1080 in landscape mode (this is for the max resolution the Blackmagic Design ATEM Mini Pro currently allows.

Step 2: Double click the padlock icon in the Layers panel to unlock the layer.

Step 3: Add a new layer by clicking the “hamburger menu” in the Layers panel and choosing Add Layer.
Step 4: In the Layers panel, drag this new level BELOW the original layer (VERY important).

Step 5: Click on the top (original) layer in the Layers panel to make it the “live” layer.
Step 6: Choose the Rectangle tool from the Toolbox.
Step 7: Double click the Colours swatches and set the colours you want. We use black for both the outline and interior of the rectangle (To use Black, set R, G and B to 0, 0, 0 as shown).
Step 8: Draw the rectangle on the page where you want your lower third to appear.

Step 9: Choose the Text tool from the Toolbox and set the colours desired the same way you did the colours for the rectangle. We use white and white (which is 255 for each of the R, G and B fields).
Step 10: Choose your font and size (We use Impact at 48 point).
Step 11: Type your text eg. your name and title, or the title of the subject etc.

Step 12: Click the Move tool in the Toolbox and move the text to the desired location inside the rectangle.

Step 13: Choose the Magic Wand tool from the Toolbox. Click anywhere on the white background and a marquis (dotted lines) will show you the selection. If you need to add an area, hold SHIFT and click that area not previously selected.
Step 14: Press Delete. This creates your transparent background shown by the “Checkerboard” fill.

Step 15: We previously created our Australian Videocamera logo as a separate image with a transparent background. To import it into this document we use File > Place Embedded and then drag it to the left hand side of the rectangle with the Move tool. You may need to size it using the Selection tool and dragging the handles.


Step 16: When the logo was imported Photoshop added it to a new layer. This layer MAY be behind the others already in the document. If so, simply select the Logo layer in the Layers panel and drag it to the top of the layer hierarchy.

Step 17: The page is now complete. We just need to export it in the right format to be able to import it into the Blackmagic Design ATEM Mini Pro Software Control program. Choose File>Export As and the panel that opens, make sure that the format is PNG and the Transparency box is ticked. Click Export, choose a filename and save location.


Step 18: In the Blackmagic Design ATEM Mini Pro Software Control program, click the Media button down the bottom and then in the file system hierarchy at left, drill down to find the file you just created. We keep all ours on an external Seagate drive in a folder called Titles, Lower Thirds etc.
Step 19: Once selected the file image will appear in the bottom left. ust drag this into an empty slot.

Step 20: To create the overlay on your live image, drag the file image from its slot to the Media Player window.
Job done.
Whilst this might initially seem an awful lot of steps (and work), once you have the hang of it, you’ll find you can create fantastic looking lower thirds, bugs, titles and graphics in seconds!


I don’t have photoshop and don’t know how to use photoshop.
Not sure how I can help there… the principles are the same for any basic graphics program. GIMP is free for example?